What are the steps to develop a custom software?
Designing a custom software requires several steps, many hours of thought, and a strong understanding of the digital environment. To create something that meets both the client’s needs and the expectations of users, six essential steps must be followed with care and precision.
Step #1 – Needs Analysis
Every web project begins with thoughtful planning and a thorough analysis of needs, possibilities, and available tools. This first step helps us fully understand the client’s business requirements. During various meetings, our technical team aims to grasp the client’s business reality, the needs to be addressed, potential challenges, and the technological ecosystem in which the company operates.
This phase allows us to:
Analyze the client’s goals and needs
Question and expand on the client’s ideas
Identify potential risks or errors and work to prevent them
Propose various design hypotheses
Most importantly, the analysis phase helps us translate client needs into software features. Identifying a need is one thing, but turning that need into efficient technology is another challenge altogether!
Step #2 – Design
Once the action plan is clearly defined, we move on to the design phase, which includes both interface and software architecture design. This step transforms the solution into diagrams and visual mockups to validate expectations and functionality.
Interface Design
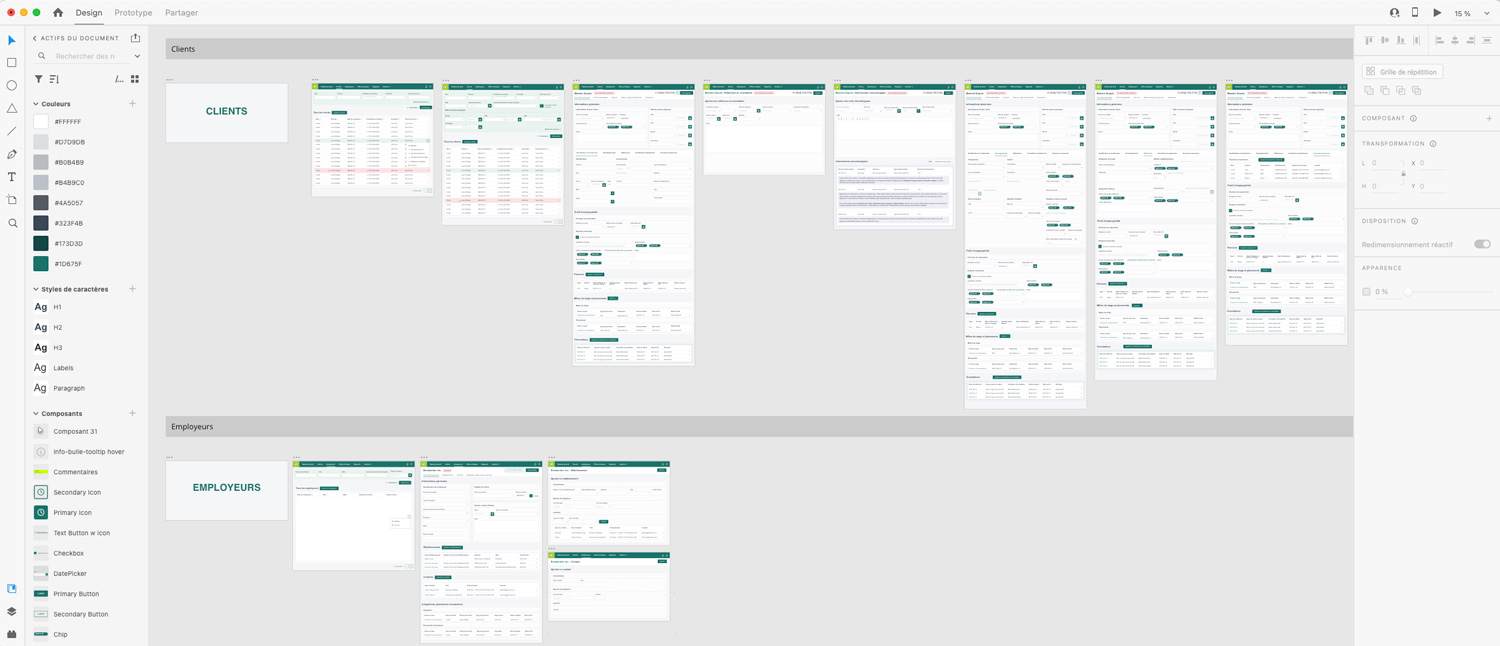
Interfaces, also known as wireframes, serve as blueprints to define the areas and components the custom software must include. These wireframes are first presented as sketches to validate usability and functionality. Once approved, our design team transforms them into visual mockups that lay out all the content (colours, images, icons, text, etc.) for users. The goal is to optimize aesthetics and the overall user experience.

Custom software interfaces designed in Adobe XD
Software Architecture Design
With the visual elements completed, we focus on software architecture.
This part of the design step presents an overview of the project’s technical structure. Based on several analysis axes, our team outlines the system architecture to minimize risks during development.
The architecture design consists of five views:
Use case view: Guides architectural decisions based on client needs
Data view: Shows how user-provided information (e.g., names or addresses) is structured and stored
Logical view: Details how the software code will be structured and what it will include (e.g., databases, video)
Process view: Describes user navigation, application flow, and back-end logic
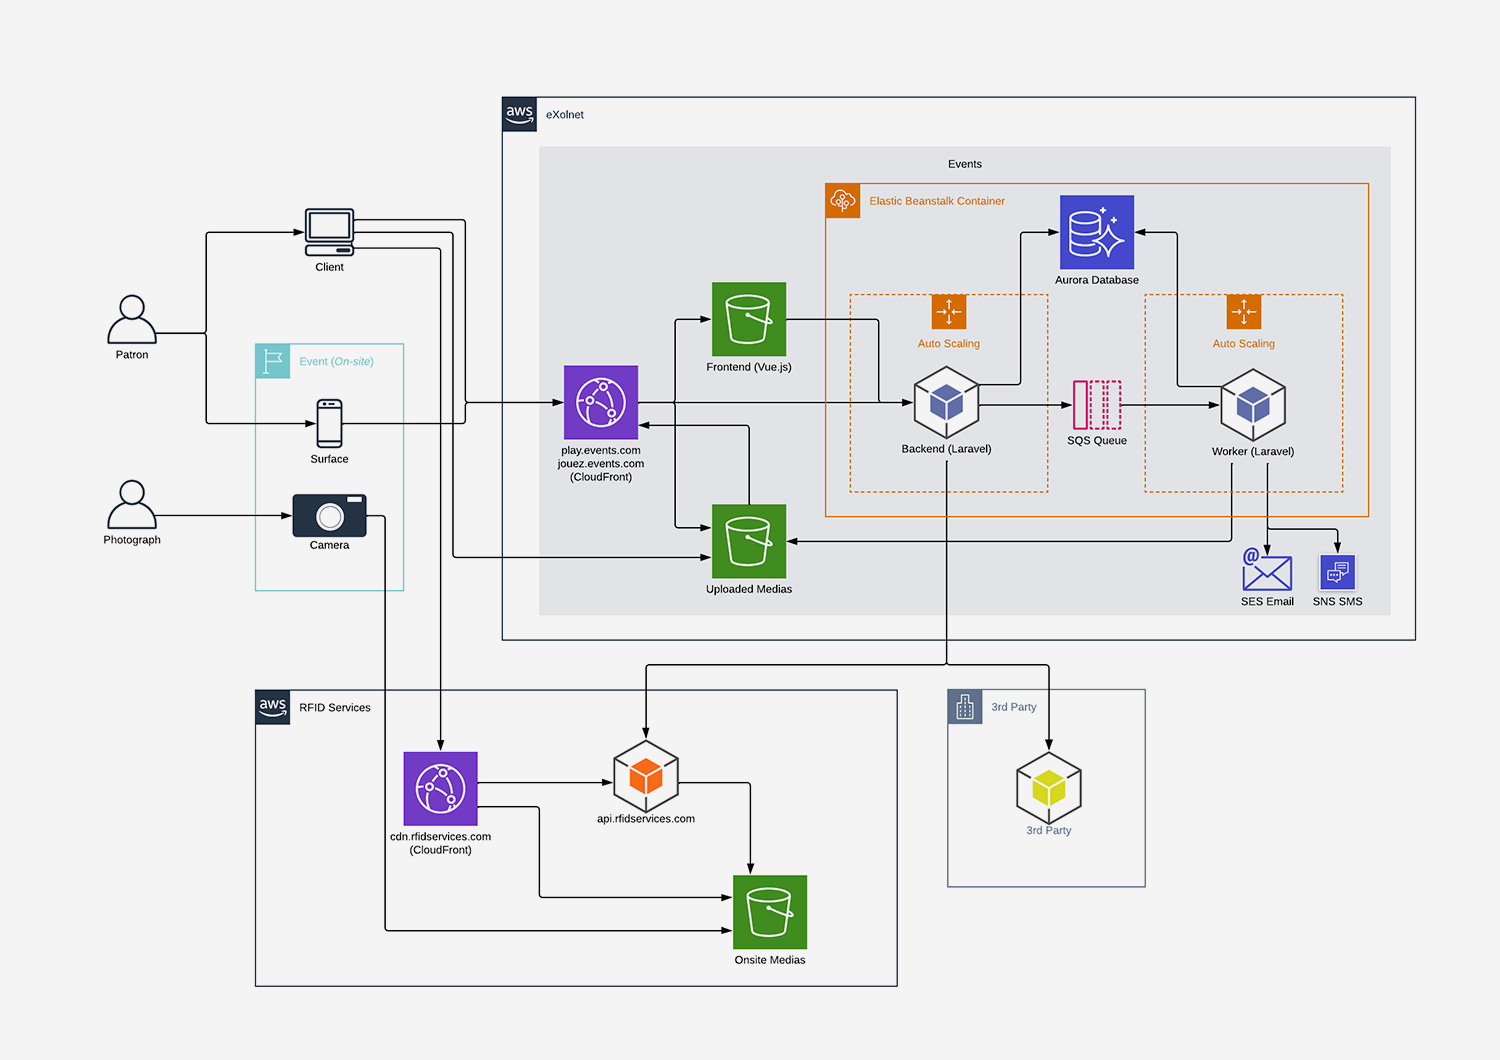
Deployment view: Explains how the software will be deployed into the final production environment

Deployment view within a software architecture
In short, this step allows us to symbolically and schematically define the different elements of one or more IT systems, including their relationships and interactions.
Step #3 – Software Development
We rely on the proven Agile methodology for developing our custom software solutions. To remain flexible and scalable, development occurs in iterative cycles called sprints. During each sprint, clients and stakeholders are invited to review the software’s progress and suggest adjustments. The short nature of sprints allows us to share updates frequently.
In a web solution context, Agile allows us to gather all established features and wish-list items into a shared product backlog. After initial development, recurring meetings help decide which features will be completed during each sprint.
Step #4 – Quality Assurance
Quality assurance is crucial to ensure the software meets the original specifications. During this phase, we implement both manual and automated testing mechanisms.
Manual Testing
Based on the initial requirements, QA specialists conduct various functional tests to assess the user experience.
They also verify that the software works across different browsers and platforms.
Automated Testing
The cornerstone of our QA process is automated testing. We run three types: unit tests, functional tests, and integration tests.
These offer many benefits:
Enable continuous integration
Facilitate long-term maintenance and code stability
Ease onboarding of new developers
Simplify code quality audits
Step #5 – Deployment
The deployment step involves launching the application in its final production environment and setting up monitoring tools. Most of this step is automated, which accelerates the deployment of changes and reduces the risk of errors.
Step #6 – Application and Server Maintenance
The final step is ongoing and begins once the application is live. Its goal is to ensure the application continues to run smoothly and evolves over time. Maintenance includes system checks (such as after component updates) and ensures the application remains current and reliable for long-term use.


